Blog

  • How to add shortcut to Home screen in Android programmatically

    I improved a little bit a solution that was found in StackOverflow. Now program saves in preferences whether a shortcut was already added and doesn’t add it in new launches of an app if user deleted it. This also saves a little bit time, since the code to add an existing shortcut doesn’t run anymore.

    final static public String PREFS_NAME = "PREFS_NAME";
    final static private String PREF_KEY_SHORTCUT_ADDED = "PREF_KEY_SHORTCUT_ADDED";
    
    
    // Creates shortcut on Android widget screen
    private void createShortcutIcon(){
    
        // Checking if ShortCut was already added
        SharedPreferences sharedPreferences = getPreferences(MODE_PRIVATE);
        boolean shortCutWasAlreadyAdded = sharedPreferences.getBoolean(PREF_KEY_SHORTCUT_ADDED, false);
        if (shortCutWasAlreadyAdded) return;
    
        Intent shortcutIntent = new Intent(getApplicationContext(), IntroActivity.class);
        shortcutIntent.addFlags(Intent.FLAG_ACTIVITY_NEW_TASK);
        shortcutIntent.addFlags(Intent.FLAG_ACTIVITY_CLEAR_TOP);
    
        Intent addIntent = new Intent();
        addIntent.putExtra(Intent.EXTRA_SHORTCUT_INTENT, shortcutIntent);
        addIntent.putExtra(Intent.EXTRA_SHORTCUT_NAME, "YourAppName");
        addIntent.putExtra(Intent.EXTRA_SHORTCUT_ICON_RESOURCE, Intent.ShortcutIconResource.fromContext(getApplicationContext(), R.drawable.ic_launcher));
        addIntent.setAction("com.android.launcher.action.INSTALL_SHORTCUT");
        getApplicationContext().sendBroadcast(addIntent);
    
        // Remembering that ShortCut was already added
        SharedPreferences.Editor editor = sharedPreferences.edit();
        editor.putBoolean(PREF_KEY_SHORTCUT_ADDED, true);
        editor.commit();
    }
    

    In Android Manifest:


  • How to create a screenshot on Android

    ANDROID

    Press and hold the Volume Down and Power buttons at the same time.

  • Open-Source Expandable Selection Tree for Android

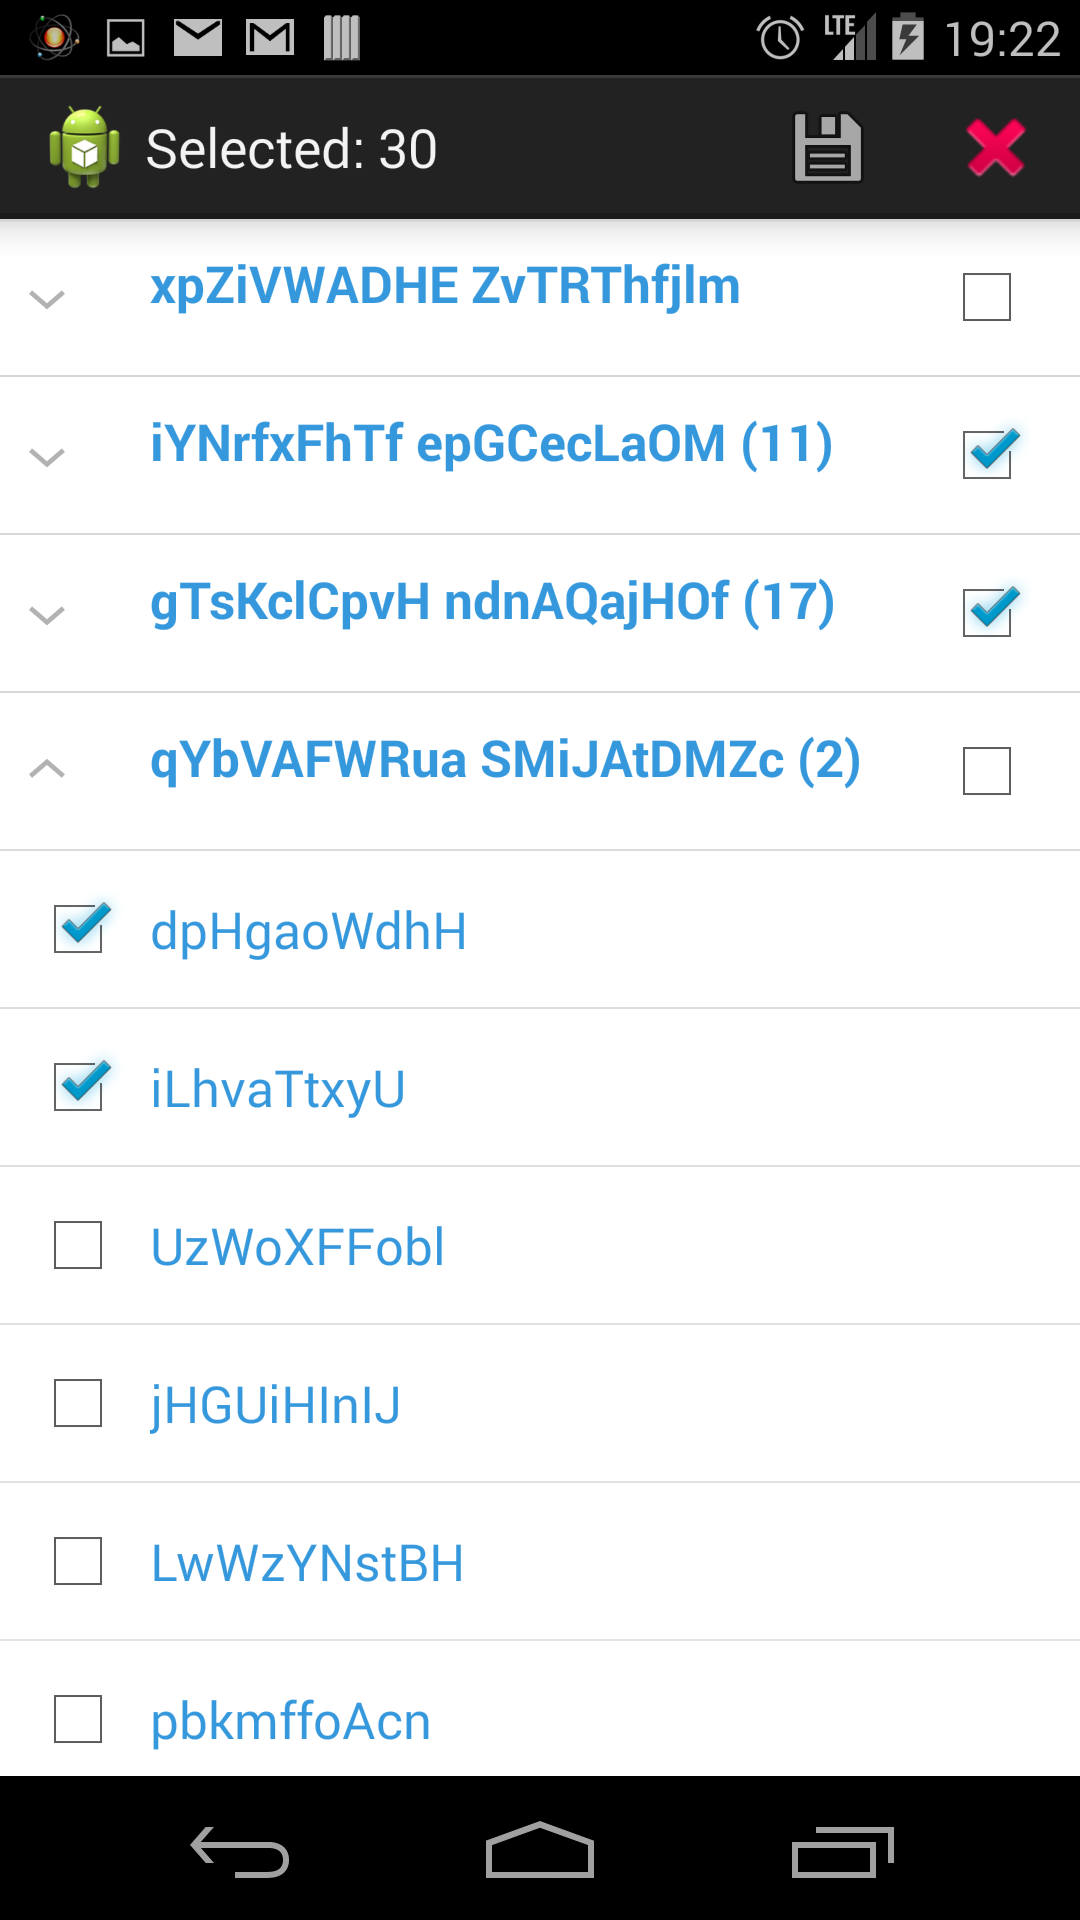
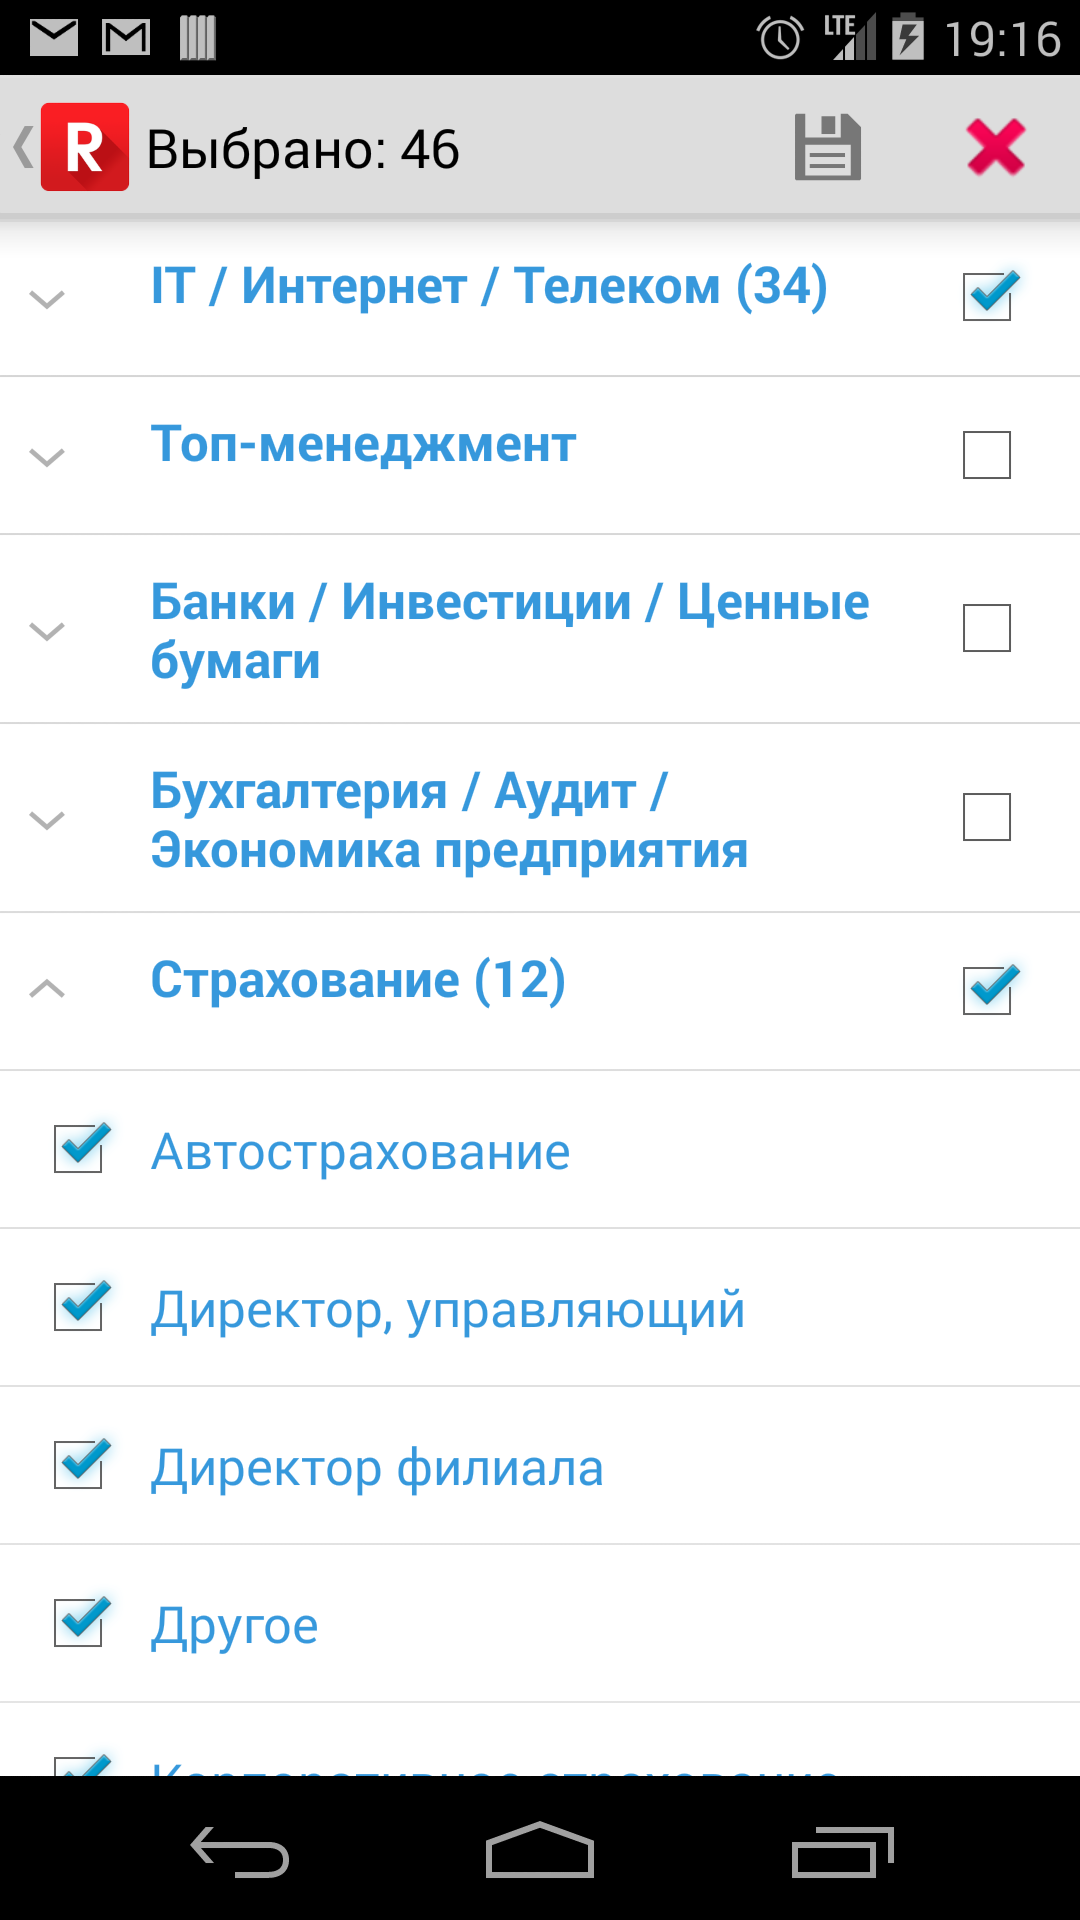
    Today I have published a new open source project on GitHub, called DKExpandableSelectionTree. It is a better expandable list view for Android that allows user to select multiple items from a tree of objects. You can clear all selections, you can select and deselect multiple items by selecting a whole group. It also displays a number of selected items inside a group in parentheses after the name of a group.

    This is how it will look in a sample project, when you clone the repository and run it:
    Screenshot_2014-05-27-19-22-47

    This is how it looks in my project:
    Screenshot_2014-05-27-19-16-17

  • New cool custom Activity Indicator for iOS

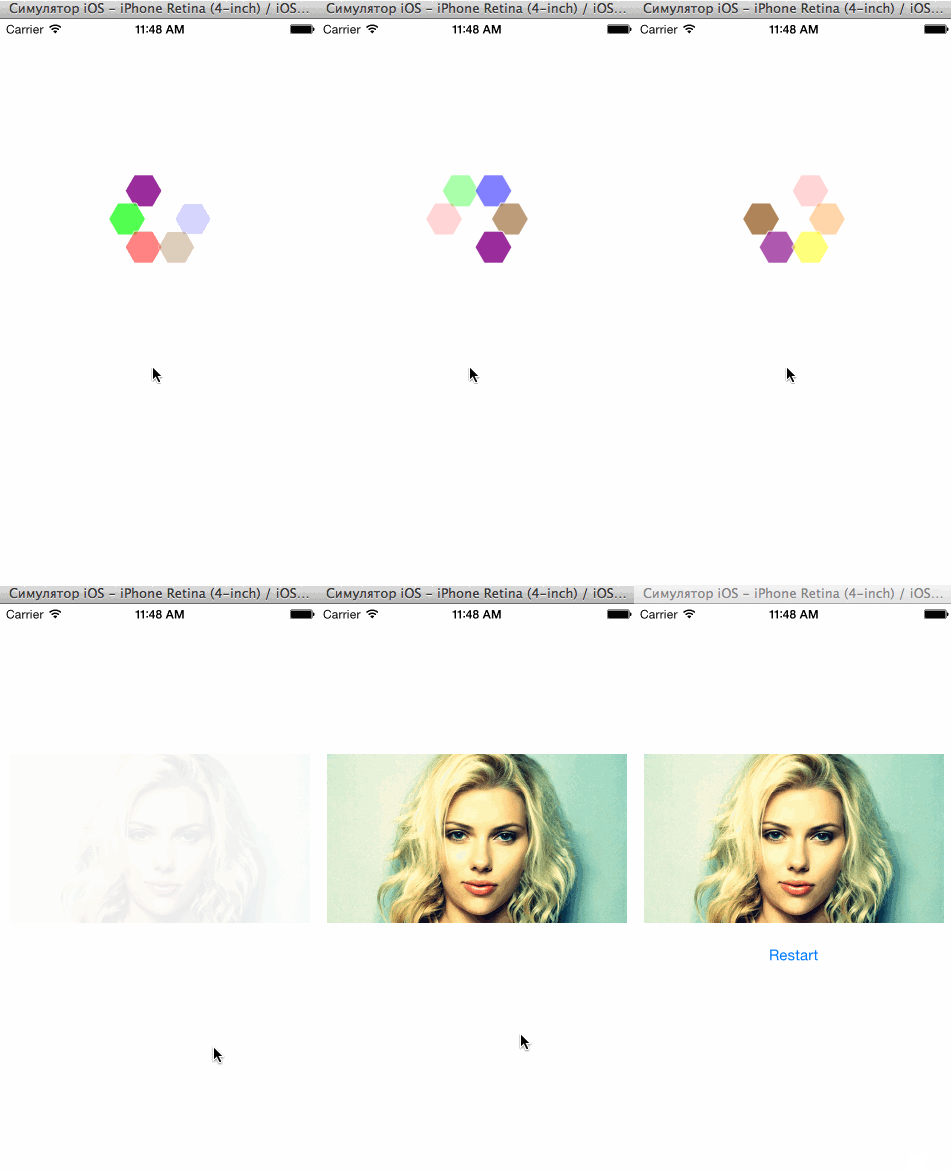
    Recently I have created a new open-source project of an activity indicator for iOS, called DKProgressHUD.

    Today I merged a contribution from Edan Lichtenstein, which significantly improves it. This is how it looks now on iPhone:

    DKProgressHUD

    DKProgressHUD on GitHub

    Available via Cocoapods:

    pod DKProgressHUD 
    
  • Mobile App Release Roadmap / Checklist

    Mobile App Release Checklist

    1. Install new version above the old one.

    2. Install your app to different devices, as many as you can (iPad, iPhone, iPhone 5, iPhone 3GS, Galaxy S4, Google Nexus 5, Nexus 3, very small screen size Android devices, etc.) Particularly, for Android and for iPad.

    3. Check different geo locations, for example, Moscow, St. Petersburg, Ufa, etc., not the only one, where you live and develop the app.

    4. Check that your app doesn’t load data to Documents folder, that is backed up in iCloud. All files should be marked as not backed up, if they can be downloaded again.

    5. Check that your app doesn’t have iPad or iPhone words in the name.

    6. Check, how data absence is handled when your app fails to load data from server. Particularly, on Android.

    7. Check, how bad answers are handled, like HTML instead of JSON. Particularly, on Android.

    8. Check, how bad objects in JSON are handled (like null objects or strings instead of objects, etc.). Particularly, on Android.

    9. If you use In-App Purchases, check that they are activated for a new version in iTunes Connect.

    10. If you use In-App Purchases, check that your app has in-apps if they are activated.

    11. Check, how absence of internet is handled.

    12. Check, how different operations with arrays and dictionaries are handled.

    I am tired of being unsuccessful while releasing new versions of the apps to the AppStore and created a checklist. Always, I forget something to check, when I release an update. Hope, this will save your time, when you publish your app versions. Using the help of testers doesn’t improve final results in these cases, so you have to check all this shit yourself.

    All these reasons in my developer experience created some shit in my life. And all these points have their own graves of my time. Check them all, when you decide to release your app version.

  • Creating fast screenshots for AppStore in iOS Simulator

    Did you know, that there is a feature to create fast screenshots for AppStore in iOS Simulator ?

    Press Cmd + S and you will get a screen of the iPhone on your desktop in an appropriate size.

    Really useful feature, that I didn’t know about. What a shame…

  • How to create UIButton that looks like UITableViewCell with AccessoryIndicator

    Sometimes you need to create only one button, that looks like a UITableViewCell with accessory indicator. Users are familiar with this control and they know that if they click it, something should appear. For example, it can be used in different forms to select something after user taps a button. Using a UITableView with one section and cell is too complex approach if you need only one such button. Even if you need some more such buttons, you can use this solution to make code a little simpler.

    I created an instance of UIButton and reached this goal after some search in StackOverflow and my own attempts. Finally, my button looks like this:
    DKAccessoryButton

    Yes, it is a UIButton, not UITableViewCell. So, how I did it?

    You can look at my repository on GitHub, I have published a source code of such button under MIT Licence Terms.
    DKAccessoryButton: https://github.com/wzbozon/DKAccessoryButton

  • Using Yandex Maps API & Core Location In iOS To Determine City Of a User By Reverse Geocoding

    My goal was to determine the city or town name of a user to fill a region text field automatically in iOS app. At first I tried to use Core Location and MapKit, but I got only city names in English, for example, ‘Ufa’.  I had to get city names in Russian, so I decided to use Yandex Maps API. This is a final result – interface with a button to get city name automatically in Russian and a textField with a city name:

    First, we add CLLocationManagerDelegate interface and an instance variable of CLLocationManager to get coordinates to our View Controller:

    @interface MyViewController : UIViewController 
    {
      CLLocationManager *_locationManager;
    }
    
    @end

    I created in my ViewController two helper methods to show and hide spinner without writing implementation of it:

    - (void)showSpinner
    {
      self.hud = [MBProgressHUD showHUDAddedTo:self.view animated:YES];
    }
    
    - (void)hideSpinner
    {
      [self.hud hide:YES];
    }

    I have a button on my ViewController. When it’s clicked a TextField is filled by a city name automatically after it is determined.

    #pragma mark - Location determination
    
    // Button click handler
    - (void)determineRegionClicked:(id)sender
    {
      [self showSpinner];
    
      // We create CLLocationManager and start  updating location
      _locationManager = [[CLLocationManager alloc] init];
      _locationManager.delegate = self;
      _locationManager.distanceFilter = kCLDistanceFilterNone;
      _locationManager.desiredAccuracy = kCLLocationAccuracyBest;
      [_locationManager startUpdatingLocation];
    }

    Here we tell, that our ViewController is a delegate of CLLocationManager.

    This is a delegate method, that does all the remaining work. It is called after coordinates are determined. I used SBJson framework to parse JSON.

    #import 
    
    ...
    
    #define YANDEX_MAPS_API_DOMAIN @"http://geocode-maps.yandex.ru/1.x/"
    
    ...
    
    - (void)locationManager:(CLLocationManager *)manager didUpdateToLocation:(CLLocation *)newLocation fromLocation:(CLLocation *)oldLocation
    {
      // Switching off location updates
      [_locationManager stopUpdatingLocation];
    
      // Reverse geocoding using Yandex Maps API
      CLLocationCoordinate2D coordinate = newLocation.coordinate;
      NSString *coordinatesString = [NSString stringWithFormat:@"%lf,%lf", coordinate.longitude, coordinate.latitude];
    
      // Creating HTTP request. Here kind=locality means that we will be searching for a city.
      NSString *urlString = [NSString stringWithFormat:@"%@?geocode=%@&results=1&lang=ru-RU&format=json&kind=locality", YANDEX_MAPS_API_DOMAIN, coordinatesString];
      NSURL *url = [NSURL URLWithString:urlString];
      NSURLRequest *urlRequest = [NSURLRequest requestWithURL:url];
    
      // Sending synchronous request in background queue using dispatch queues
      dispatch_queue_t backgroundQueue = dispatch_queue_create("bgQueue", nil);
      dispatch_async(backgroundQueue, ^{
        __autoreleasing NSHTTPURLResponse *urlResponse = nil;
        __autoreleasing NSError *error = nil;
        NSData *resultData = [NSURLConnection sendSynchronousRequest:urlRequest returningResponse:&urlResponse error:&error];
    
        // Parsing a result
        if (! error) {
          NSLog(@"Status Code: %d %@", [urlResponse statusCode], [NSHTTPURLResponse localizedStringForStatusCode:[urlResponse statusCode]]);
    
          NSString *resultString = [[NSString alloc] initWithData:resultData encoding:NSUTF8StringEncoding];
          // NSLog(@"resultString:%@", resultString);
    
          SBJsonParser *jsonParser = [[SBJsonParser alloc] init];
          NSDictionary *jsonObject = [jsonParser objectWithString:resultString];
    
          // If count is zero, then region is not found
          int count = [jsonObject[@"response"][@"GeoObjectCollection"][@"metaDataProperty"][@"GeocoderResponseMetaData"][@"found"] integerValue];
          if (count == 0) {
            dispatch_async(dispatch_get_main_queue(), ^{
              [self showRegionNotFoundError];
            });
            return;
          }
    
          // Searching in a JSON
          NSString *city = [jsonObject[@"response"][@"GeoObjectCollection"][@"featureMember"] firstObject][@"GeoObject"][@"name"];
          NSLog(@"Yandex API City returned: %@", city);
    
          dispatch_async(dispatch_get_main_queue(), ^{
            // Here I have a code that updates my UI after city is determined
          });
    
        }
        else {
          // If failed to get data from Yandex API
          NSLog(@"An error occured, Status Code: %i", urlResponse.statusCode);
          NSLog(@"Description: %@", [error localizedDescription]);
          NSLog(@"Response Body: %@", [[NSString alloc] initWithData:resultData encoding:NSUTF8StringEncoding]);
    
          dispatch_async(dispatch_get_main_queue(), ^{
            [self showRegionNotFoundError];
          });
        }
    
        dispatch_async(dispatch_get_main_queue(), ^{
          [self hideSpinner];
        });
    
      });
    }
    

    This is an error handling for Core Location:

    - (void)locationManager:(CLLocationManager *)manager didFailWithError:(NSError *)error
    {
      [_locationManager stopUpdatingLocation];
    
      [self showRegionNotFoundError];
    }

    This method shows an error if we failed to determine city automatically:

    - (void)showRegionNotFoundError
    {
      [self hideSpinner];
    
      UIAlertView *alertView = [[UIAlertView alloc] initWithTitle:@"Error" message:@"Failed to determine your city automatically, please, select the one from a list." delegate:nil cancelButtonTitle:@"OK" otherButtonTitles:nil];
      [alertView show];
    }

    The same goal can be achieved using MapKit instead of Yandex Maps API for English city names:

    #import 
    #import 
    #import 
    
    ... 
    
    - (void)locationManager:(CLLocationManager *)manager didUpdateToLocation:(CLLocation *)newLocation fromLocation:(CLLocation *)oldLocation {
    
    ... 
    
      CLGeocoder *geocoder = [[CLGeocoder alloc] init] ;
      
      [geocoder reverseGeocodeLocation:newLocation completionHandler:^(NSArray *placemarks, NSError *error) {
        
        [self hideSpinner];
        
        if (! error )
        {
          CLPlacemark *placemark = [placemarks objectAtIndex:0];
          NSString *city = [[placemark addressDictionary] objectForKey:(NSString *)kABPersonAddressCityKey];
          NSLog(@"determinedRegion: %@", city);
        
          NSLog(@"Full placemark address dictionary: %@", placemark.addressDictionary);
        }
        else
        {
          [self showRegionNotFoundError];
          
          NSLog(@"Geocode failed with error %@", error);
          NSLog(@"\nCurrent Location Not Detected\n");
        }
      }];
    

    Finally, some test locations. Replace the appropriate string to simulate another coordinates. This could be done in Simulator settings also in Debug/Geo section.

      // Test for Novgorod
      // NSString *coordinatesString = [NSString stringWithFormat:@"%lf,%lf", 44.0000f, 56.3333f];
    
      // Test for Ufa city
      // NSString *coordinatesString = [NSString stringWithFormat:@"%lf,%lf", 55.9667f, 54.7500f];
    
      // Test for a small town Meleuz in the Republic of Bashkortostan, Russia
      // NSString *coordinatesString = [NSString stringWithFormat:@"%lf,%lf", 55.9333f, 52.9500f];
    
      // Test for a random location on a map
      // NSString *coordinatesString = [NSString stringWithFormat:@"%lf,%lf", 56.9333f, 53.9500f];
    
      // Test for Moscow
      // NSString *coordinatesString = [NSString stringWithFormat:@"%lf,%lf", 37.6167f, 55.7500f];

    
  • New Open Source Audio Player for iOS

    I added today my new Open Source Audio Player for iOS to GitHub.

    It’s main advantages:

    1. Simple
    2. Neat design
    3. Very little code to make your app play audio
    4. Everything is incapsulated inside component
    5. It can appear and disappear with animation
    6. It is flexible, so that it looks nice both on iPhone and iPad in two orientations

    You are welcome to use it and make pull requests:

    https://github.com/wzbozon/DKAudioPlayer 


    ScreenShot:

  • Android Animation one after other

    I wrote about a new approach to animate multiple objects in Android one after another. For example, 6 ImageButtons and 6 TextViews. I decided to duplicate this solution in my blog.

    My approach to reach this goal can be useful when you need to animate a lot of views one after another. You can use `setStartOffset` method to set a delay before animation begins. So, if you know, how much time will take for your first animation to end, you can set this as a delay for your second animation. This is an example where I animated six `ImageButtons` and six `TextViews` below them one after another:

        public void animateButtons() {
        	// An array of buttons
            int[] imageButtonIds = {R.id.searchButton, R.id.favoriteButton, R.id.responseButton, R.id.articleButton, R.id.resumeButton, R.id.subscribeButton};
            // Array of textViews
            int[] textViewIds = {R.id.searchTextView, R.id.favoriteTextView, R.id.responseTextView, R.id.articleTextView, R.id.resumeTextView, R.id.subscribeTextView};
    
            int i = 1;
    
            for (int viewId : imageButtonIds) {
    
                ImageButton imageButton = (ImageButton) findViewById(viewId);
                // Animation from a file fade.xml in folder res/anim
                Animation fadeAnimation = AnimationUtils.loadAnimation(this, R.anim.fade);
                // Delay for each animation is 100 ms bigger than for previous one
                fadeAnimation.setStartOffset(i * 100);
                imageButton.startAnimation(fadeAnimation);
                
                // The same animation is for textViews
                int textViewId = textViewIds[i-1];
                TextView textView = (TextView) findViewById(textViewId);
                textView.startAnimation(fadeAnimation);
                
                i ++;
            }
        }
    

    In my `res/anim` folder I have a file, called `fade.xml` with these contents:


    Here http://stackoverflow.com/questions/3519682/android-animation-one-after-other is this post and two other approaches – using AnimationSet and using listeners.